If you need a few custom shirts quickly, learning how to make your own t shirt print at home can be a practical solution. It works well for a family event, a school spirit day, a one-off team shirt, or a test run before placing a larger order. The key is knowing which home method fits your artwork, fabric, and expectations.
Home printing can absolutely produce a wearable shirt. What it usually cannot do is match the consistency, durability, and finish of commercial screen printing or heat-applied production done with professional equipment. That does not make the DIY route a bad choice. It just means the best results come from treating it like a short-run project, not a long-term uniform program.
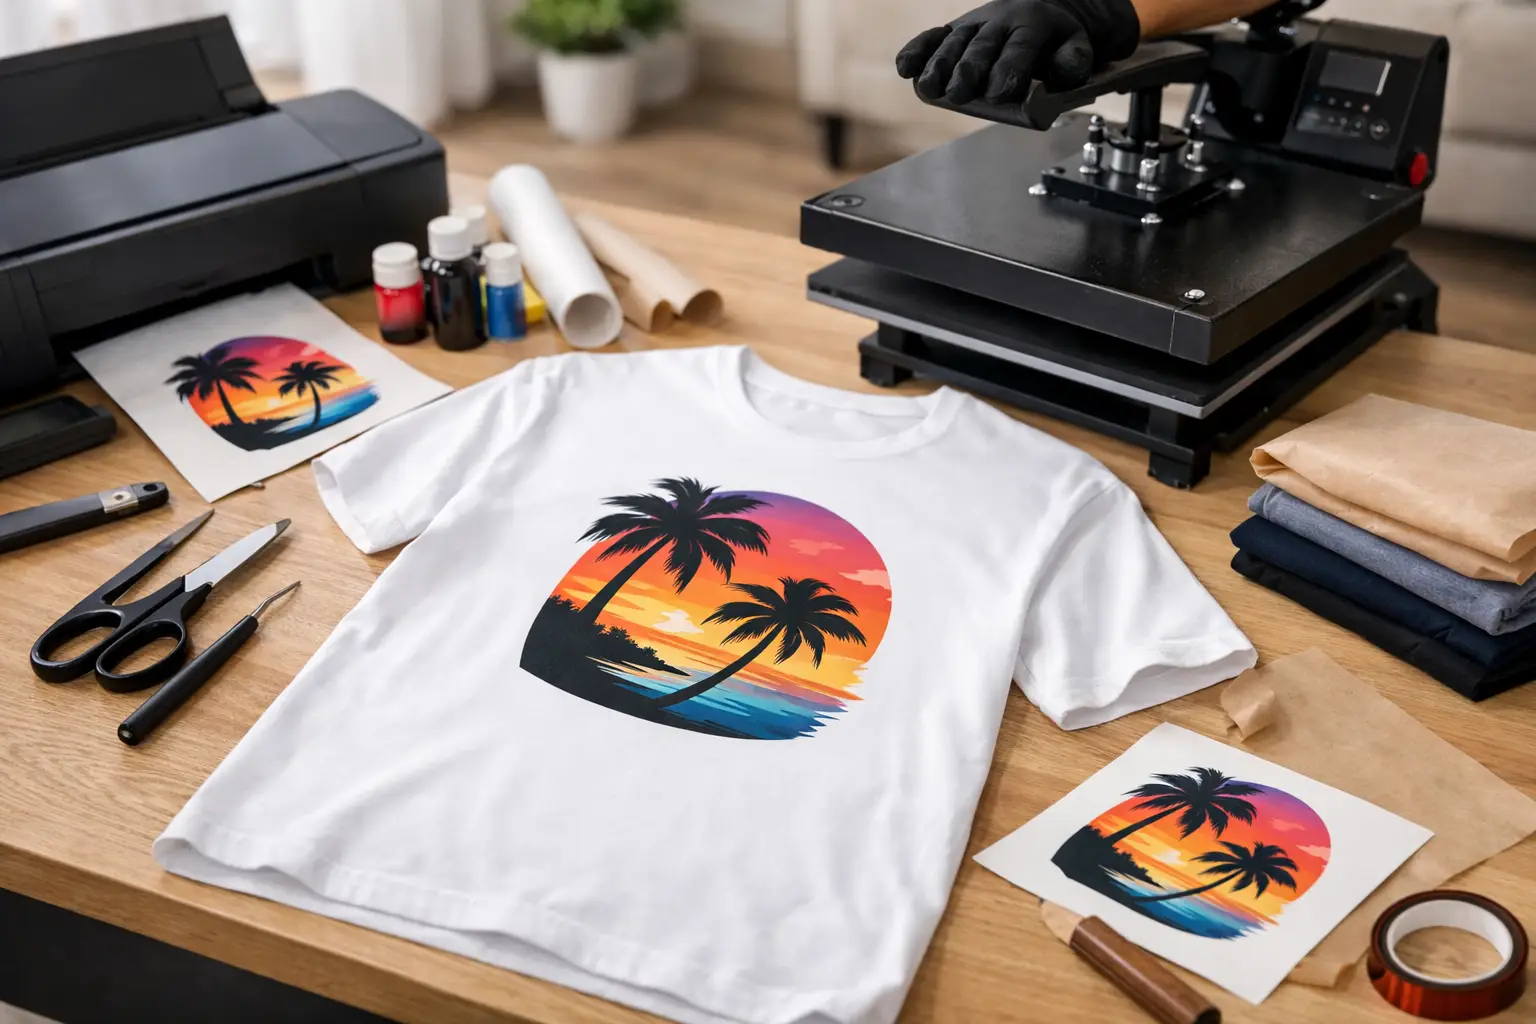
How to make your own t shirt print at home: choose the right method
There are three realistic options for most people printing at home. The first is heat transfer paper with a home inkjet or laser printer. The second is heat transfer vinyl cut by hand or with a craft cutter. The third is DIY screen printing with a basic frame and stencil setup.
For most beginners, transfer paper is the fastest path. You print the design, press it onto the shirt with a heat press or iron, and peel. It is affordable and good for photo prints or full-color artwork, but it tends to feel heavier on the garment and may crack or fade faster over time.
Heat transfer vinyl is better when your design is simple, like names, numbers, one-color logos, or bold text. It gives a cleaner, more professional look than many low-cost transfer papers, but layering multiple colors takes patience.
DIY screen printing is the best home method for durability and a softer print when done correctly. It also has the steepest learning curve. If you are making a dozen shirts with the same one-color design, it can be worth the setup. If you only need two shirts by tonight, it probably is not.
What you need before you print
Your supply list depends on the method, but your shirt choice matters no matter what. Start with a clean, smooth T-shirt made from cotton or a cotton-rich blend. Ringspun cotton usually prints better than heavily textured garments. Avoid shirts with too much stretch or deep ribbing in the print area.
For transfer paper, you will need compatible paper for either light or dark garments, a printer that matches the paper type, scissors or a cutting machine, and an iron or heat press. A heat press is more reliable because it applies consistent pressure and temperature. An iron can work, but uneven heat often leads to weak adhesion.
For vinyl, you will need heat transfer vinyl, a cutter or steady hand for trimming, a weeding tool, and a press or iron. For screen printing, you will need a screen, ink, squeegee, stencil or emulsion method, and a flat protected workspace.
No matter which route you choose, pre-press or pre-iron the shirt for a few seconds first. That removes moisture and wrinkles and gives you a cleaner surface to work with.
The simplest method: transfer paper
If your goal is speed and convenience, transfer paper is usually the best place to start. Begin by checking whether your paper is made for light shirts or dark shirts. This matters more than most first-time printers expect. Light-shirt paper is often translucent and depends on the shirt color showing through. Dark-shirt paper has an opaque backing so the design stays visible.
Set up your artwork at the exact print size and resolution. If the design includes text and you are using transfer paper for light garments, you may need to mirror the image before printing. Most product instructions will tell you whether to reverse it.
Print a test on regular paper first. This step saves shirts. You can confirm the size, placement, and color balance before using your transfer sheet.
Once printed, trim close to the design if the product requires it. Then position the artwork on the shirt and apply heat based on the paper manufacturer’s instructions. Temperature, pressure, and time all matter. Too little heat and the print may peel. Too much and you can scorch the paper or distort the image.
Let the transfer cool or peel hot, depending on the instructions. Do not guess here. Different products are built for different peel methods, and using the wrong one can ruin the print.
Using heat transfer vinyl for names, numbers, and logos
Vinyl is often the better choice when you want clean lettering or a simple graphic that looks more uniform. That is why it is commonly used for player names, jersey numbers, staff shirts, and event apparel.
Create your design in solid shapes rather than gradients or photo effects. Cut the vinyl, weed out the excess material, and place the carrier sheet onto the shirt. Like transfer paper, vinyl needs even heat and pressure to bond properly.
One common mistake is using too much heat on performance fabrics. Polyester can scorch or show press marks. If you are printing on athletic wear, use materials and settings intended for that fabric. Cotton is more forgiving.
Vinyl also has practical limits. Large solid designs can feel heavy. Fine details may not weed cleanly. If your artwork is complex, this method can quickly become frustrating.
DIY screen printing at home
If you want a softer, more production-style print, screen printing is the home method with the most upside. It is also the least forgiving. Registration, ink consistency, curing temperature, and screen preparation all affect the final result.
A basic one-color print can be done with a pre-made screen and a stencil. Secure the shirt on a flat surface, place the screen, flood it with ink, and pull the squeegee steadily across. Then lift carefully and cure the ink according to the product directions.
The biggest challenge for home printers is curing. If the ink is not cured fully, it will wash out or crack early. Professional shops use conveyor dryers and tested production controls for a reason. At home, you can get decent results, but repeatability is harder.
That trade-off matters if you are making shirts for staff, volunteers, or a school group. A shirt that looks good for one event is different from a shirt that needs to hold up through months of wear and washing.
Design choices that print better at home
Simple art wins. Bold text, one- or two-color logos, and clear shapes almost always print better at home than distressed textures, tiny lines, or high-detail photos.
Placement also matters. Full front prints are common, but smaller left chest prints are easier to position cleanly and often look more polished. If you are printing for an organization, resist the urge to make the logo too large. A balanced design tends to look more professional.
Color contrast is another factor. Dark ink on a light shirt or a bright opaque transfer on a dark shirt gives you the best readability. Mid-tone-on-mid-tone designs often disappoint once they are actually pressed onto fabric.
Common mistakes that ruin home-printed shirts
Most failed home prints come down to a few preventable issues. The first is using the wrong transfer material for the garment color or fabric type. The second is rushing the heat application. The third is skipping test prints.
Poor artwork setup is another frequent problem. Low-resolution files may look acceptable on a screen but print fuzzy on fabric. If the design came from a screenshot or social media graphic, it may not be strong enough for apparel.
Washing too soon can also shorten the life of the print. Let the shirt rest if the material instructions call for it, then wash inside out in cold water and avoid high dryer heat. Even a good home print usually lasts longer with gentler care.
When home printing makes sense and when it does not
For a birthday trip, spirit week, a startup sample, or a quick proof of concept, printing at home can be the right call. It gives you speed, control, and a low upfront cost for very small quantities.
If you need consistent branding across multiple garments, exact color matching, or durability for repeated use, home printing starts to show its limits. That is especially true for businesses, schools, teams, and events where every shirt represents the organization. At that point, professional production is usually more cost-effective than redoing inconsistent DIY results.
That is why many customers use home printing as a trial step. They test placement, gather feedback, and then move into a more reliable production run once the design is approved. For organizations that need that next step, a partner with real production experience can save time, reduce waste, and keep the finished shirts looking consistent from the first piece to the last.
If you decide to make your own shirts at home, keep the process simple, choose the method that fits the job, and test before you commit. A clean one-color print done carefully will outperform an ambitious design rushed at the kitchen table every time.